In addition to normal JavaScript blocks, the Pinegrow Web Editor also offers dynamic PHP blocks. In this tutorial we will look at how to add these powerful blocks to your custom theme!
In this series of short tutorials we will convert the Pinegrow Bootstrap 5 template “Agency” to a multi-page WordPress theme using Gutenberg blocks and the built-in WordPress theme controls. Let’s get started!
Prefer to read? Scroll past the video.
This tutorial is available in video and textual form. Watch the video, or continue reading. Of course, you can also do both!
Creating nested blocks and class toggles
Before starting this tutorial you should already have set-up our theme as outlined in tutorial 1. Optionally, you can also follow the creation of regular and nested blocks from tutorial part 2 and part 3.
Dynamic Blocks
Up to this point in the tutorial series we have only added normal JavaScript blocks. The normal blocks store and retrieve block specific content from the WordPress database. However, they can’t access content located in other blocks, pages, or posts. In order to accomplish this we need to use a dynamic block.
Working with dynamic blocks is more akin to the “traditional” workflow of making a WordPress theme using PHP and calls to built-in WordPress functions. While they allow for a greater freedom of content, they require reloading every time the user makes an edit. So, to make using the editor more enjoyable and user friendly it is a good idea to use normal blocks unless dynamic content is needed.
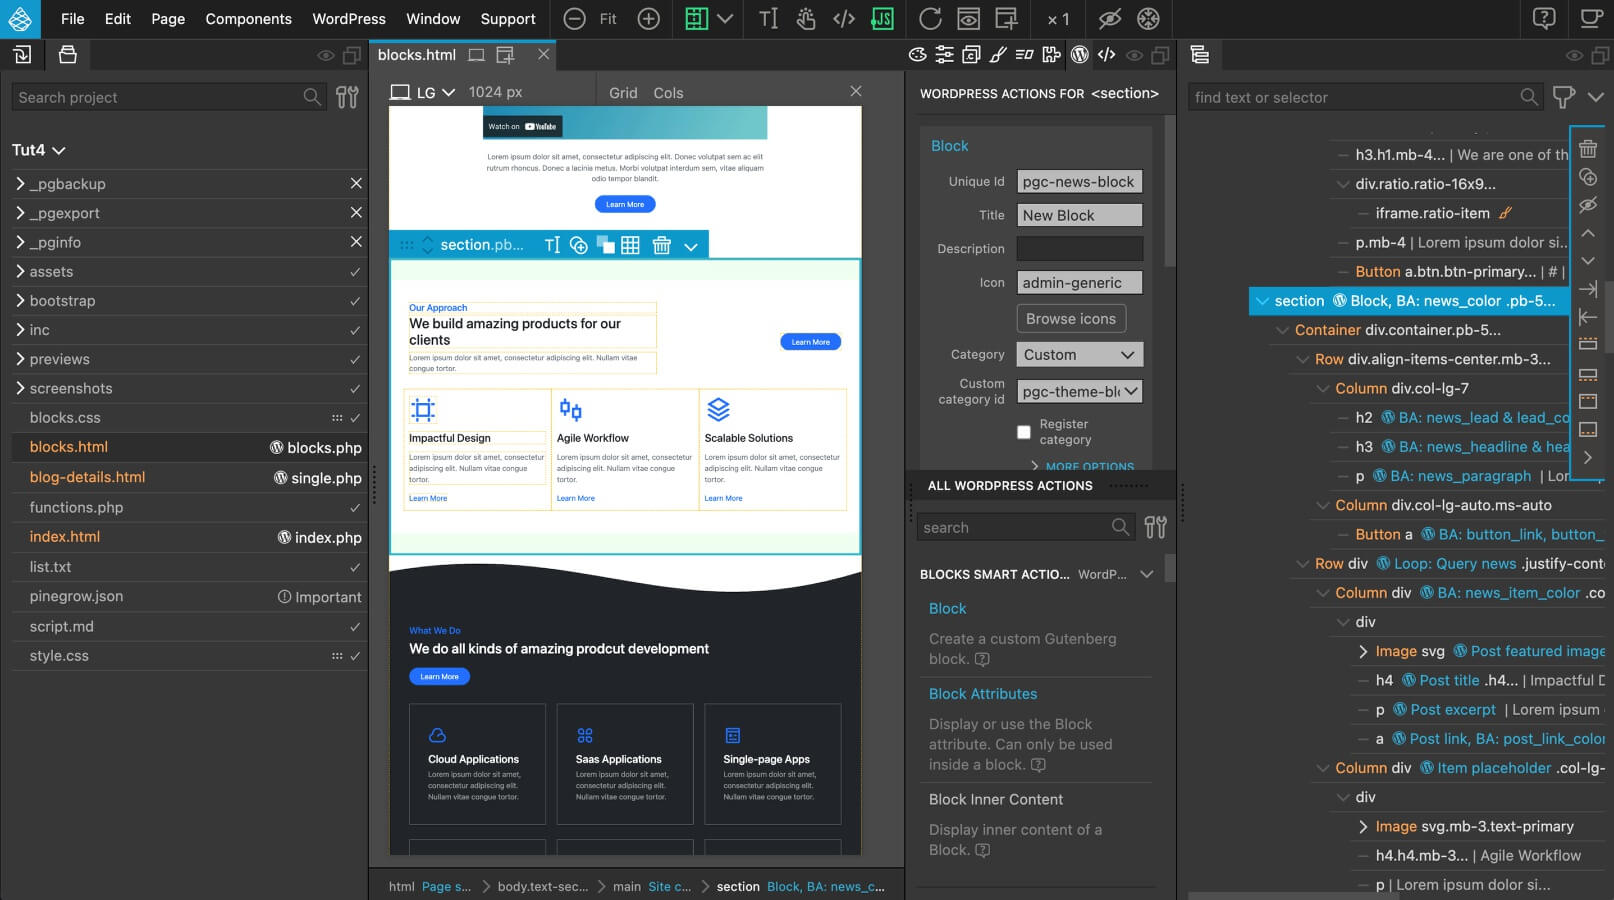
In this tutorial we will convert the third section of the Agency template into a dynamic news block. This block will load in the three latest post from the custom news post type. Let’s get started!
Creating the dynamic block
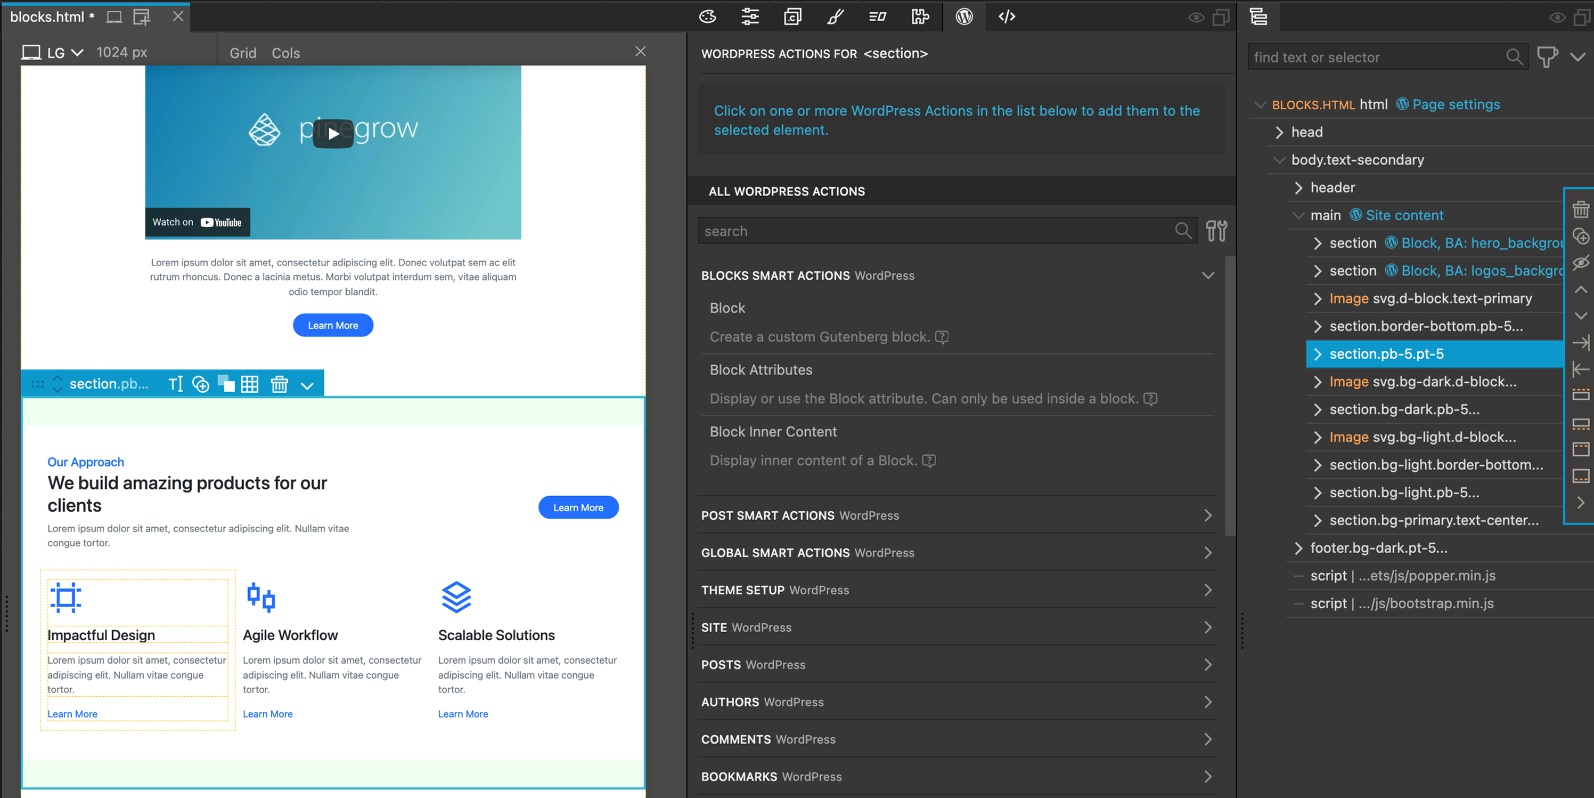
- Make sure the “block.html” page is open.
- Select the forth section in either the Page View or Tree panel.
- From the WordPress Actions panel click on the “Block” action.
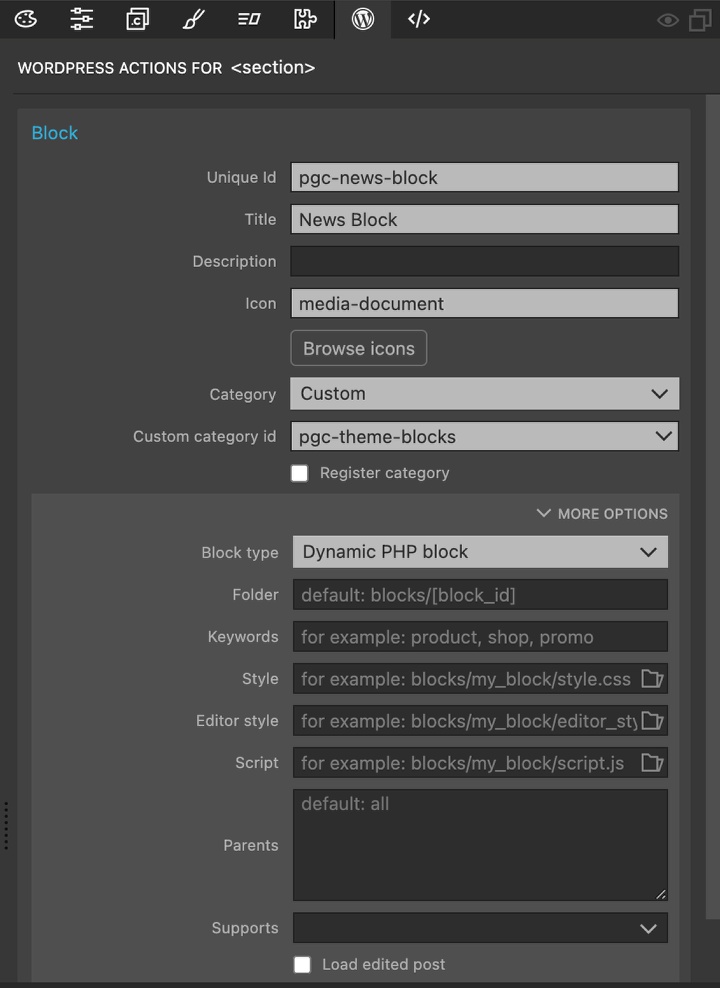
Fill out the block details, making sure to select “Dynamic PHP block” in the ‘Block type’ input.
- Add a unique id, I prefer to prefix mine, Title and select an icon (remember that if you use a dashicon you do not need the ‘dashicon-‘ prefix).
- For ‘Category’ select custom and then choose the already registered id for our blocks from the dropdown.
- Under more options, select “Dynamic PHP block” in the ‘Block type’ input. Pinegrow should automatically detect our WordPress actions within the block and assign it correctly, but to avoid a potential error, it is easier to set it manually.
Adding internal attribute controls
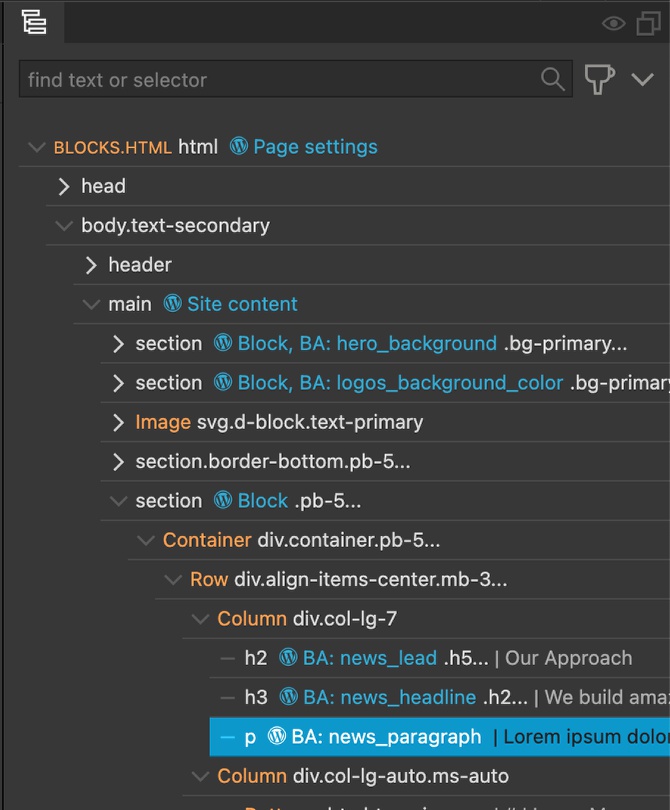
Adding block attributes to elements in a dynamic block is the same as in a normal block. Simply highlight the element, add the “Block attributes” action, and fill out the required info.
For the three sections of text at the top of the news block add controls for the content. You can choose to change the control type to ‘Rich Text’ or leave the setting on ‘Auto’, in which case a regular input field will be displayed.
Additionally, add second “Block Attributes” controls to the top lead and headline in order to change the text color. Both of these are controlled by a Bootstrap class of ‘text-color’. We can use the ‘Select’ control to provide the user a list of possible colors.
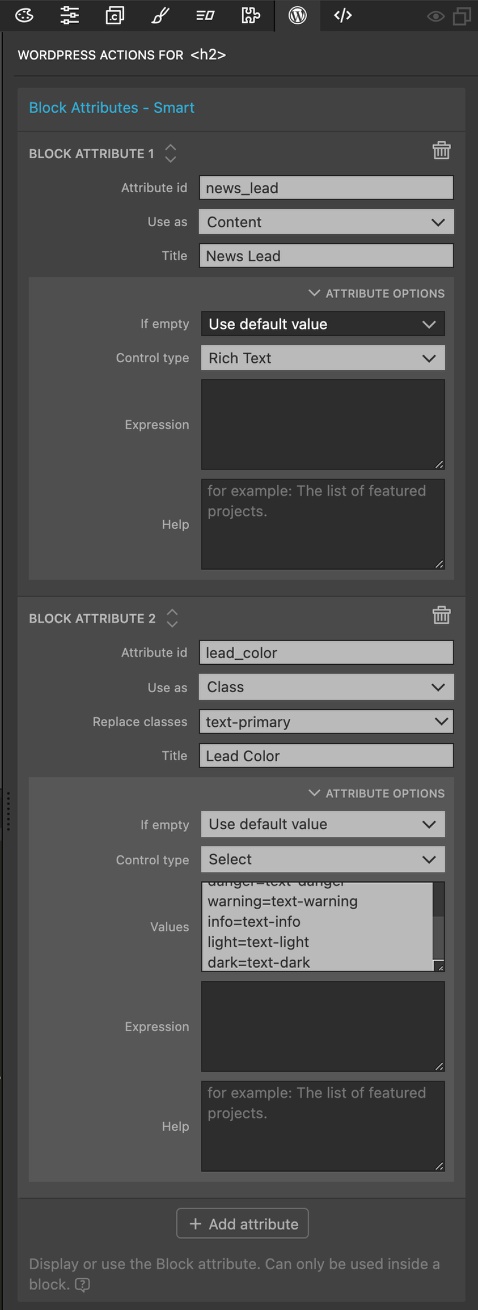
- Select the lead or headline element on the page.
- Click on the “+Add attribute” button to add a second control.
- Add a unique id and title.
- For “Use as” select ‘class’.
- Select the ‘text-primary’ (for the lead) or ‘text-dark’ (for the headline) class in the “Replace classes” input.
- In the Attribute Options section set the “Control type” to ‘Select’.
- In the “Values” input add the list of selectable color classes.
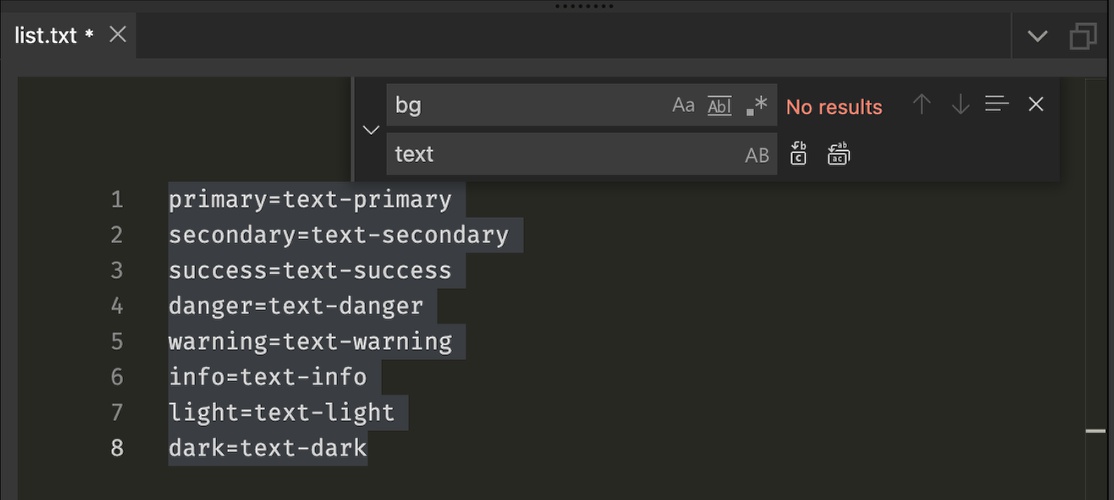
If you have the list of color values saved in your project folder you can open it in the built-in code editor by double-clicking the file name in the Project panel. If needed, you can then do a find and replace to change the class prefix, for example, from ‘bg-primary’ to ‘text-primary’.
Using the native WordPress controls
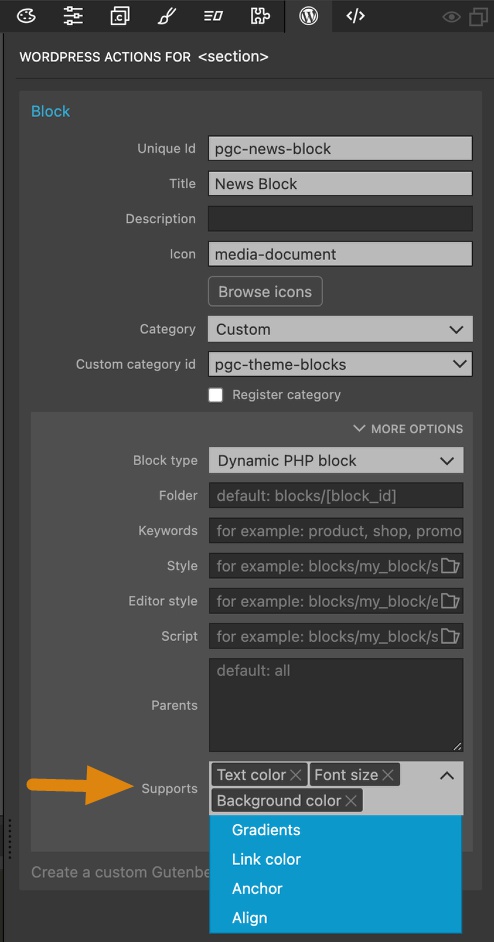
We added block controls for the lead and headline because the color of the text was controlled by Bootstrap classes. The paragraph text inherits color and typography properties from its parent element. So, here we can either choose to add another select control to the section, or enable the native controls. To enable the native controls, simply select the section with the original block attribute and within the “More Options” pick the desired controls from the “Supports” input. At the same time we can also enable the ‘Background color’ control to be able to change the section color.
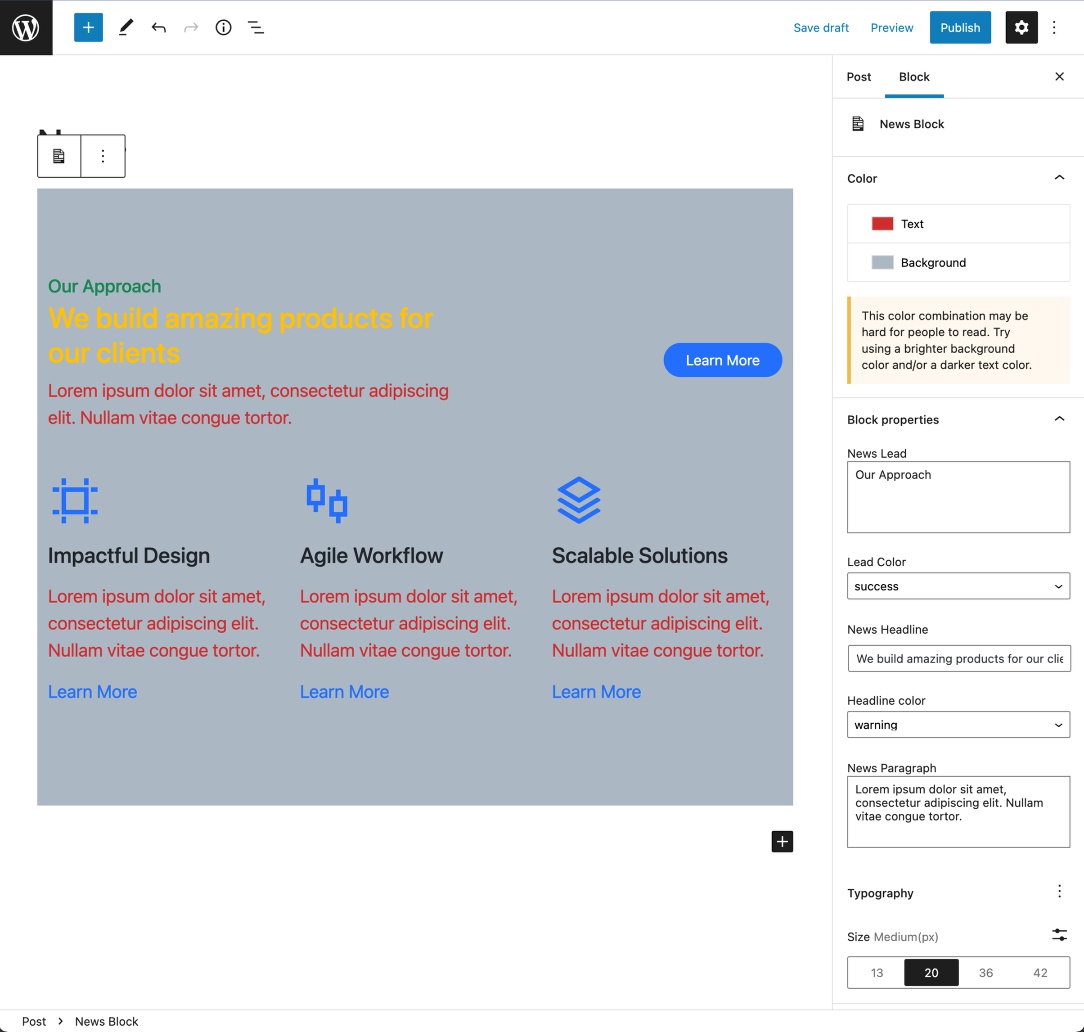
We can now save the page and export our theme to see our news block with controls. Navigating into WordPress and adding the news block in a post we will see a loading spinner when the block is added and any time we make an edit. Under the block controls at the top is a section for colors. This allows us to set both the paragraph color and the section color. Next down are all of our custom controls for the content and colors of the top text elements. Finally, there is a set of controls labelled “Typography” that allows us to set the paragraph font size.
Button controls
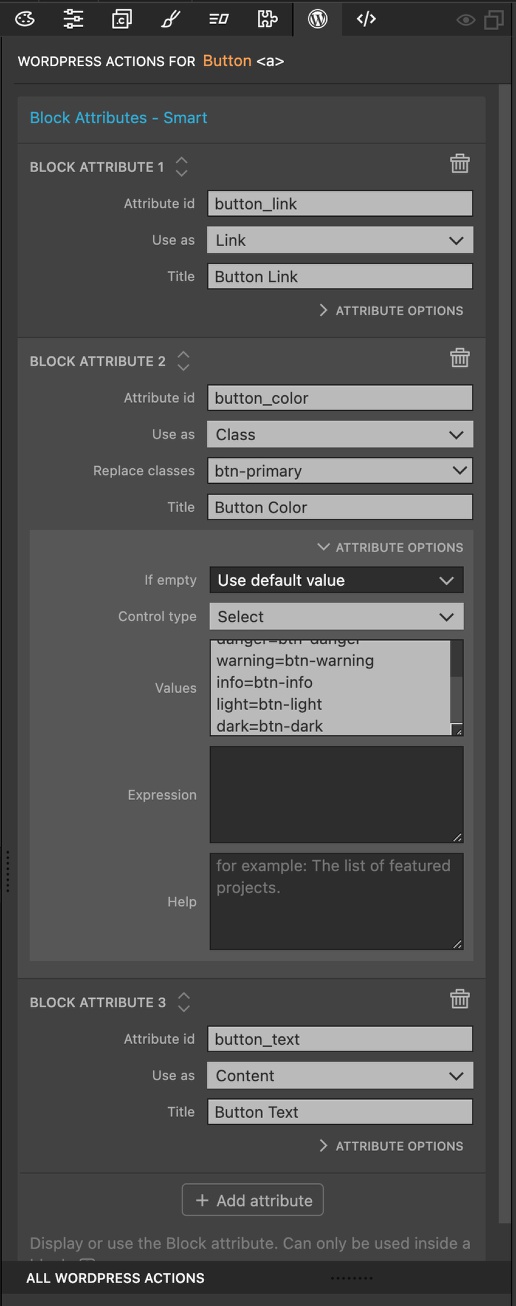
For the button we can add controls like we did for the buttons in the top hero section in the second tutorial. One Block Attributes control will change the button link, the next the button color by changing the ‘btn-color’ class using a select control, and the final changing the button text. Note, in Bootstrap the button color class also controls the hover color of both the button and text. If you want a different text color you need to add another class and another control.
The news block
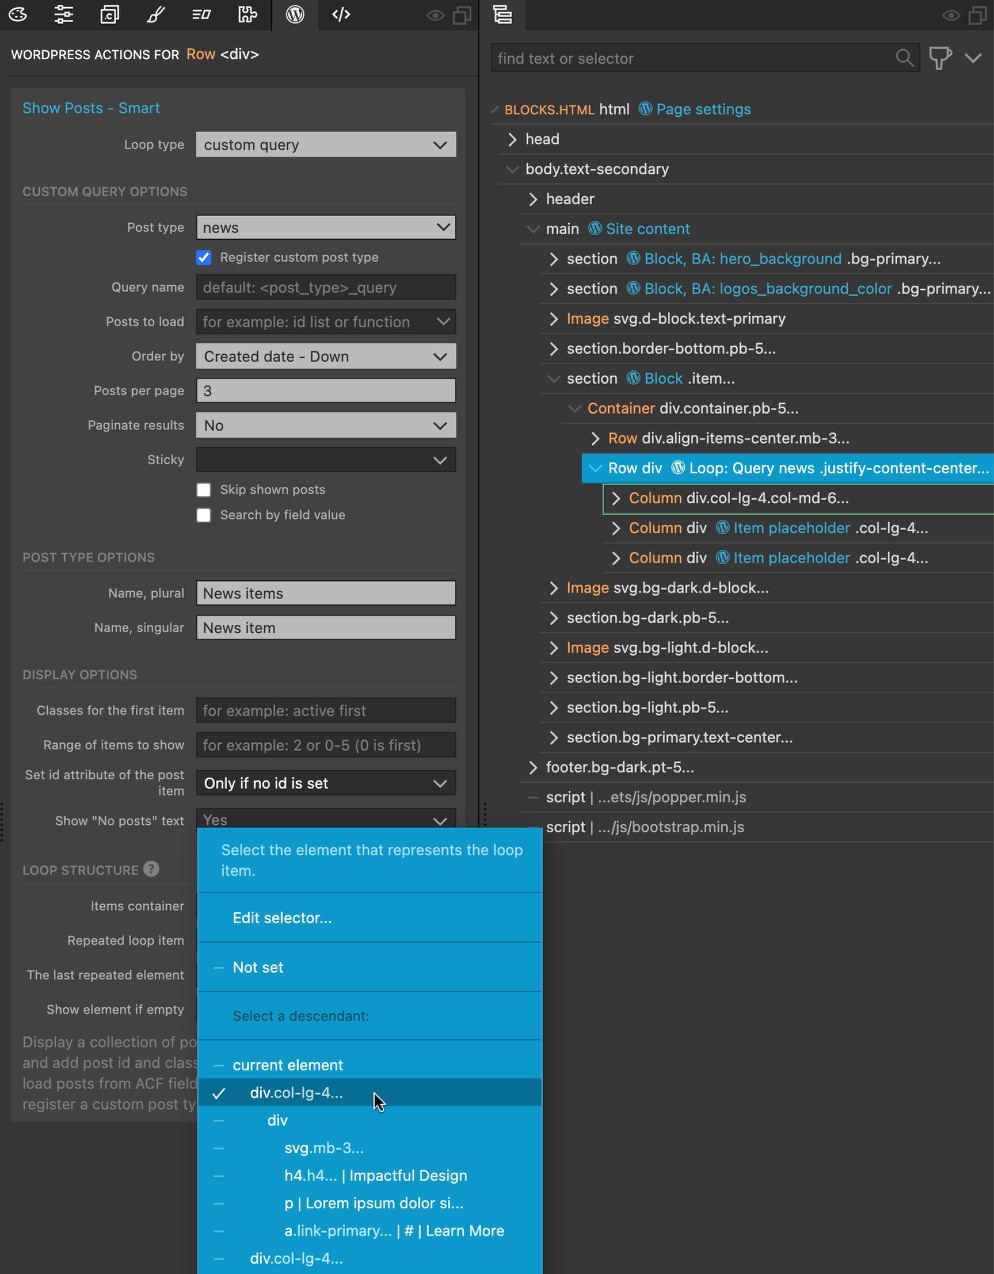
The second row of the section contains three columns. We will convert the columns to be news items with a WordPress loop that duplicates the first column and changes the content to the dynamic content loaded from the database.
- Select the last two columns from the Page View or Tree panel.
- In the WordPress actions panel search for “export”.
- Select the “Item placeholder” smart action. This will prevent these two columns from being exported.
- Select the parent row of the columns.
- In the WordPress Actions panel open the “Post Smart Actions” section and select the “Show Posts”.
- For “Loop type” select ‘custom query’.
- For the “Post type” enter ‘news’ and click the “Register custom post type” checkbox.
- I elected to set the “Order by” input to ‘Created date – Down’ to load in the latest news items.
- Set the “Posts per page” to ‘3’ and turn off pagination.
- For “Post Type Options” enter plural and singular names. I used ‘News items’ and ‘News item’
- Finally, for the “Repeated loop item” select the first column as target.
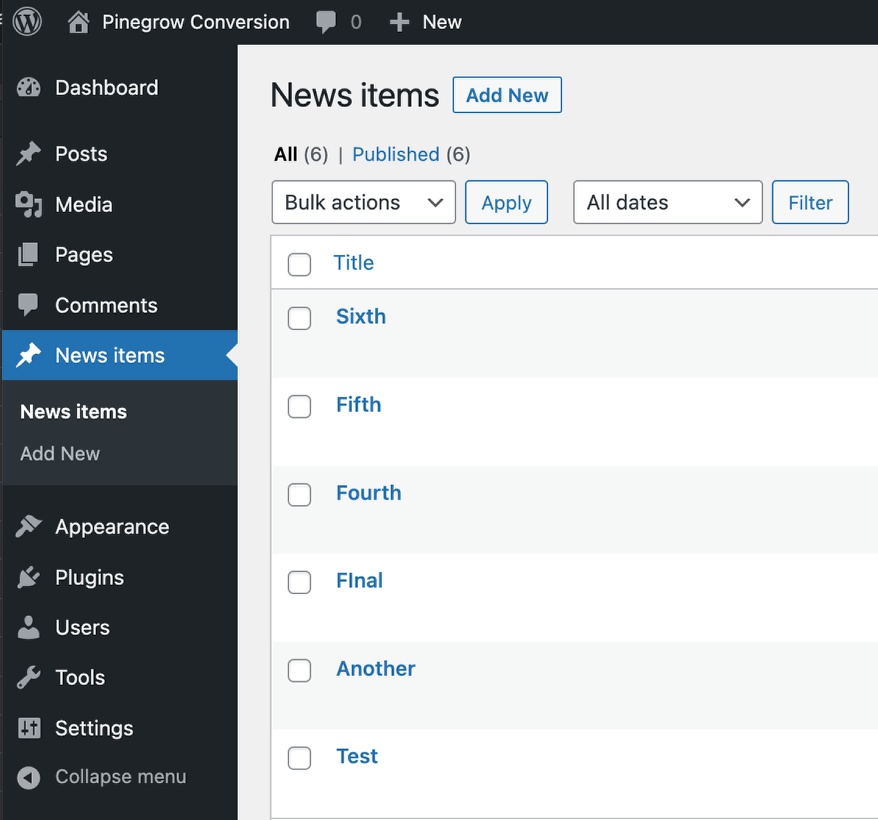
If we now save our file and export the theme, we will see a change in our WordPress dashboard. Along the left side there will be a new item named “News Items” for our custom post type.
Adding post content
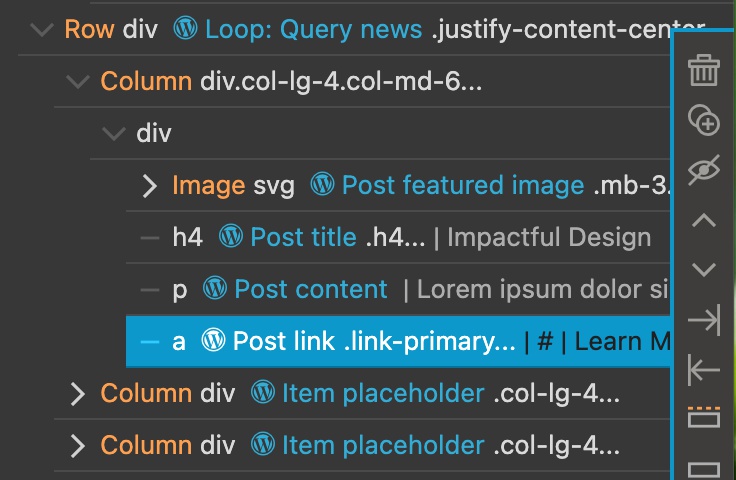
Next, we have to bring the custom post type content from the query into our page. Instead of “Block Attributes” actions, we will use WordPress actions from the “Post Smart Actions” section.
- Select the image in the first column from the Page View or Tree panel.
- Add the “Post Featured Image” action and select ‘post-thumbnail’ for size.
- Select the ‘h4’ element and add the “Post title” action.
- Select the ‘p’ element and add the “Post content” action.
- Select the ‘a’ element and add the “Post link” action.

Saving, exporting our theme and then reloading our post containing the News block we can now see our posts from the News Items.
Finishing up
We can add “Block Attributes” actions onto our News Item headlines, content, and “Learn More” button just as we did with the other elements of the block. You can mix-and-match dynamic and normal block controls. However, there is one caveat. Since we are duplicating the first item, any changes will also occur for the other two News Items that are displayed. So, if we change the Color of the item headline, the color will change for all three. While it is possible to change our theme so that each News item is a separate block, it would take a lot of custom PHP.
The only other control I might add to this would be a “Block attributes” control on the row where the loop was added to allow control of the background color. I hope you can easily see that Pinegrow lets you create a multitude of controls for any of your blocks!
In the next tutorial I will add new templates for showing our post content and post archives along with a few new blocks.
Until next tutorial, have fun designing with Pinegrow!
Discuss this tutorial
Have questions or comments about this tutorial? Let’s talk about it on our forum.
Get in touch
Would you like to see your favorite theme or blocks library featured in the next tutorial? Let us know in the forum or by email!